This post will cover step-by-step guide to help you on automating EC2 instance creation using the AWS CLI.
Most developers prefer to use AWS CLI to create and maintain resources since it avoids the tedious process of clicking through the AWS console and going through different services individually.
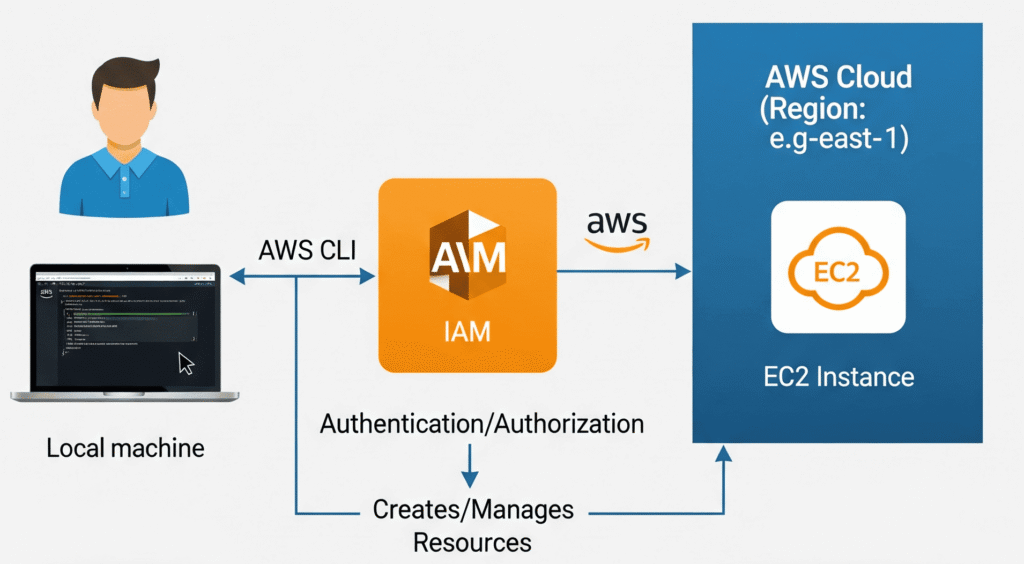
Below show the flow of how this will be achieved

If you don’t have time to go through the full post, use the below command :
aws ec2 run-instances --image-id ami-xxx --instance-type t2.micro --key-name MyKeyPairGuide To Automate EC2 Instance Creation Using AWS CLI
Step 1 : Setting Up for CLI Access in IAM
Before you can use the CLI, you need to create a dedicated user with programmatic access. This is a security best practice, as it avoids using your root account credentials.
Navigate to the IAM service. In the left navigation pane, click on Users and then click Create user.

- User name: Give your user a descriptive name (e.g.,
cli-user).
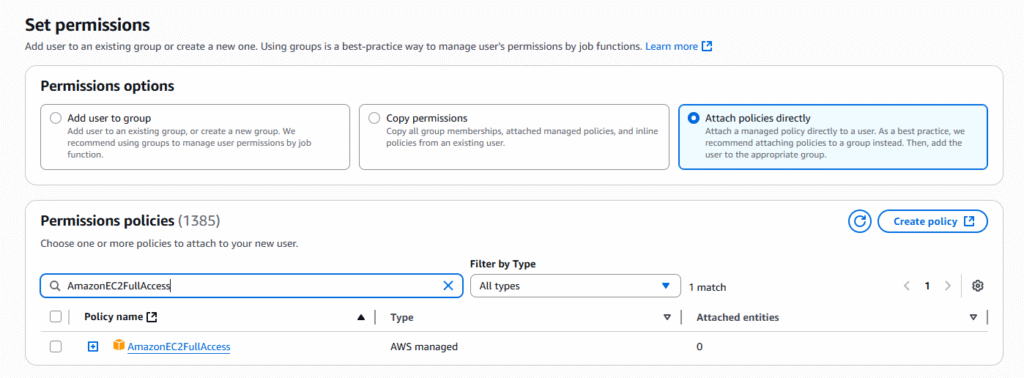
- Permissions options: Select Attach policies directly.
- Permissions policies: Search for and select
AmazonEC2FullAccess. This policy grants the user permissions to create, modify, and delete EC2 resources.

- Note: For a real-world production environment, you would create a more restrictive custom policy following the principle of least privilege.

Click Next, review your settings, and then click Create user.
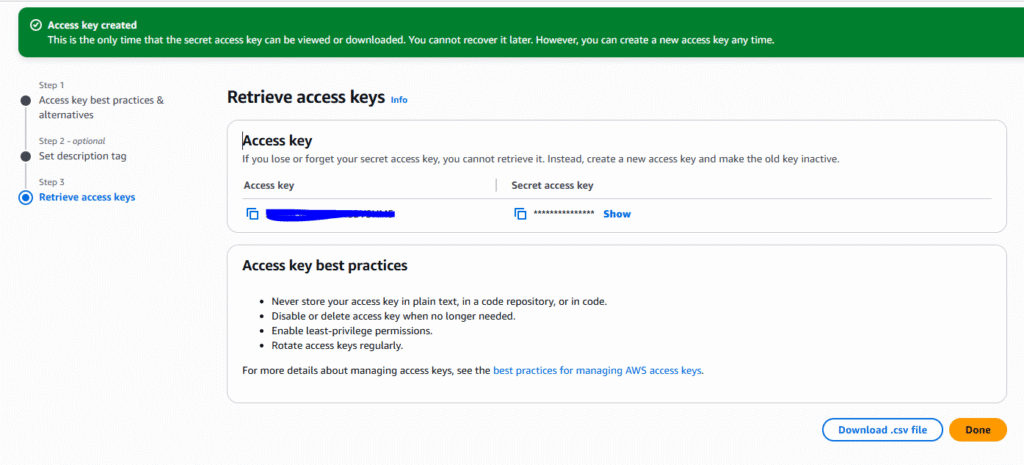
- Retrieve your credentials: Once the user is created, click on their name in the user list. Go to the Security credentials tab and click Create access key.
Select Command Line Interface (CLI) as the use case, confirm the recommendation, and click Next.
Click Create access key.

- IMPORTANT: This is your only chance to view and download the Access key ID and Secret access key. Copy them to a secure location or download the
.csvfile. You will need these in the next step.
Also, create an inline policy to give permission for the user to create Key Pair for EC2 .

Step 2 : AWS CLI: Installation and Configuration
Install the AWS CLI: Run the MSI installer from the AWS website using the below command
curl "https://awscli.amazonaws.com/awscli-exe-linux-x86_64.zip" -o "awscliv2.zip"
unzip awscliv2.zip
sudo ./aws/install
aws --version- Configure the CLI: This step links your CLI to the IAM user you created. Run the following command – aws configure
You will be prompted to enter the credentials you saved earlier:
- AWS Access Key ID: Paste the Access Key ID.
- AWS Secret Access Key: Paste the Secret Access Key.
- Default region name: Enter the region where you want to create your resources (e.g.,
us-east-1,ap-south-1). - Default output format: You can leave this as
jsonor set it totextortable.jsonis recommended for scripting.

Also Read : Building Secure Portfolio Website – AWS | Azure
Step 3: Creating an Instance via CLI
In this step, we’ll create an EC2 instance with a single command. For this, you’ll need an AMI ID and a Key Pair.
Create a Key Pair
# This command creates a new key pair named "MyKeyPair" and saves the private key to a file named MyKeyPair.pem
aws ec2 create-key-pair --key-name MyKeyPair --query 'KeyMaterial' --output text > MyKeyPair.pem

# On Linux/macOS, you must set the permissions of the key file
chmod 400 MyKeyPair.pem
Find an AMI ID:
An Amazon Machine Image (AMI) is a template for your instance. We’ll use the Amazon Linux 2 AMI, which is Free Tier eligible. You can find the latest AMI ID for your region in the EC2 console
Launch EC2 Instance
Now, launch the Instance using the below command
aws ec2 run-instances --image-id ami-0de716d6197524dd9 --count 1 --instance-type t2.micro --key-name MyKeyPair --tag-specifications ResourceType=instance,Tags=[{Key=Name,Value=My-CLI-Instance}]When you run this, the CLI will output a JSON object with details about your new instance. Look for the "InstanceId"

Start and Stop Instances via CLI Automate starting/stopping of EC2 instances using the CLI.
Managing your instance’s state is just as easy. This is incredibly useful for saving costs by stopping instances when they are not in use.
- To Stop the Instance – aws ec2 stop-instances –instance-ids <instanceid>
- To Start the Instance – aws ec2 start-instances –instance-ids <instanceid>
- To Terminate the Instance – aws ec2 terminate-instances –instance-ids <instanceid>
That’s it, you have now launched and controlled the EC2 instance completely via AWS CLI.
